
I decided to do a watercolor based research project. Below
is the reference we will be using.

And below is the final piece? Wait, is this a tutorial on
how to paint watercolor paintings? Should
I order brushes and supplies?

Oh, it’s a 3D model! With watercolor textures. Way more appropriate
for 3D class! And we can even see the models from different angles!


But how do we do this?
You can even see areas where the color bleeds into other meshes! Impossible!
Well, actually it is simple. A combination of texturing, transparencies, and
good old-fashioned modeling! Let’s get started!
First, choosing the right image. For this project I wanted
an image where there is no definite end, and the lines span off into eternity. I
wanted something very sketchy, but still geometric. And finally, for extra
challenge, I wanted to have the colors slightly bleed into one another. As you
can see, my choice below fulfills all three requirements:

I brought that image into Maya. This is an important step, because if done incorrectly, your final rendering will suffer. What we’re looking for is consistently. Block out the scene, and pay close attention to the architecture of the picture. We want to match perspective and shapes, so the final scene can match as closely as possible.
We are using our image plane to match the models as closely
as possible. A good tip is to have a second viewport, with the image plane
always up, so you can quickly check if you’re starting to stray. Also, put a
key on that camera, so you never accidentally move it, and Maya saves the
location!

After we finish modeling, start UVing! It is more important than usual to have good UVs for this project, as working in Photoshop can help when creating trick paining effects. Also, if you want to go above and beyond, you can even print out your UVs, paint them with traditional media, and scan them back in! This technique was used in 2015’s King’s Quest (https://www.youtube.com/watch?v=dLfrVKiYvcc) I however, stayed digital. Now, because we want to paint the entire scene at the same time, we’re going to have to import each UV as its own texture set. The easiest way to do this, is to create unique lamberts for each UV and name them MI_ (item name). That way, 3DCoat or Substance names them appropriately when exporting, and the object itself is imported with a unique material slot.

Finally, its time to import into 3DCoat! We can export the
whole scene at the same time, if we did our naming convention’s correctly. If,
however, you want to export each asset individually or a mistake was made,
3DCoat does support importing or replacing after creating your scene.
Now we have a blank scene. The first thing to do, is to
change the background in 3DCoat. Choose whichever color is the base for your
image. In this case, it is pure white. Now add a fill layer to all of the
meshes of that same color. I’m my case, it is a winter wonderland.

Now that we have our base, create a new layer, and start making outlines. This might be the most important step, since the rest of our texturing will be based on the work done here. Outline each major shape, and add details. Based on my image, I tried to reinforce the sketchy style, so I both use the Straight-Line Tool, and then went over lines again, freehanded, to make everything feel hand drawn. Exaggeration is key here. (I could probably do another pass on it, to make the lines even more exaggerated.)
Once everything is outlined, we can move on to the fun. It’s
time to paint. But first, before we get started we have to do something counter
intuitive. We have to make everything invisible! In 3DCoat, you can toggle visibility
by hiding the Layer 0 (also note, never paint on Layer 0, as nothing on it is
ever saved!) and we also have to hide the white layer we created as well. (Make
sure to name your layers! It is a life saver)
Since, I decided to stay mostly in 3DCoat, so I had to
import my Watercolor Brushes into the program. 3DCoat does support Photoshop
brushes, and there are many resources for it. Here’s a tutorial on creating
your own Brushes in Photoshop. And here are some premade brushes for free to
download.
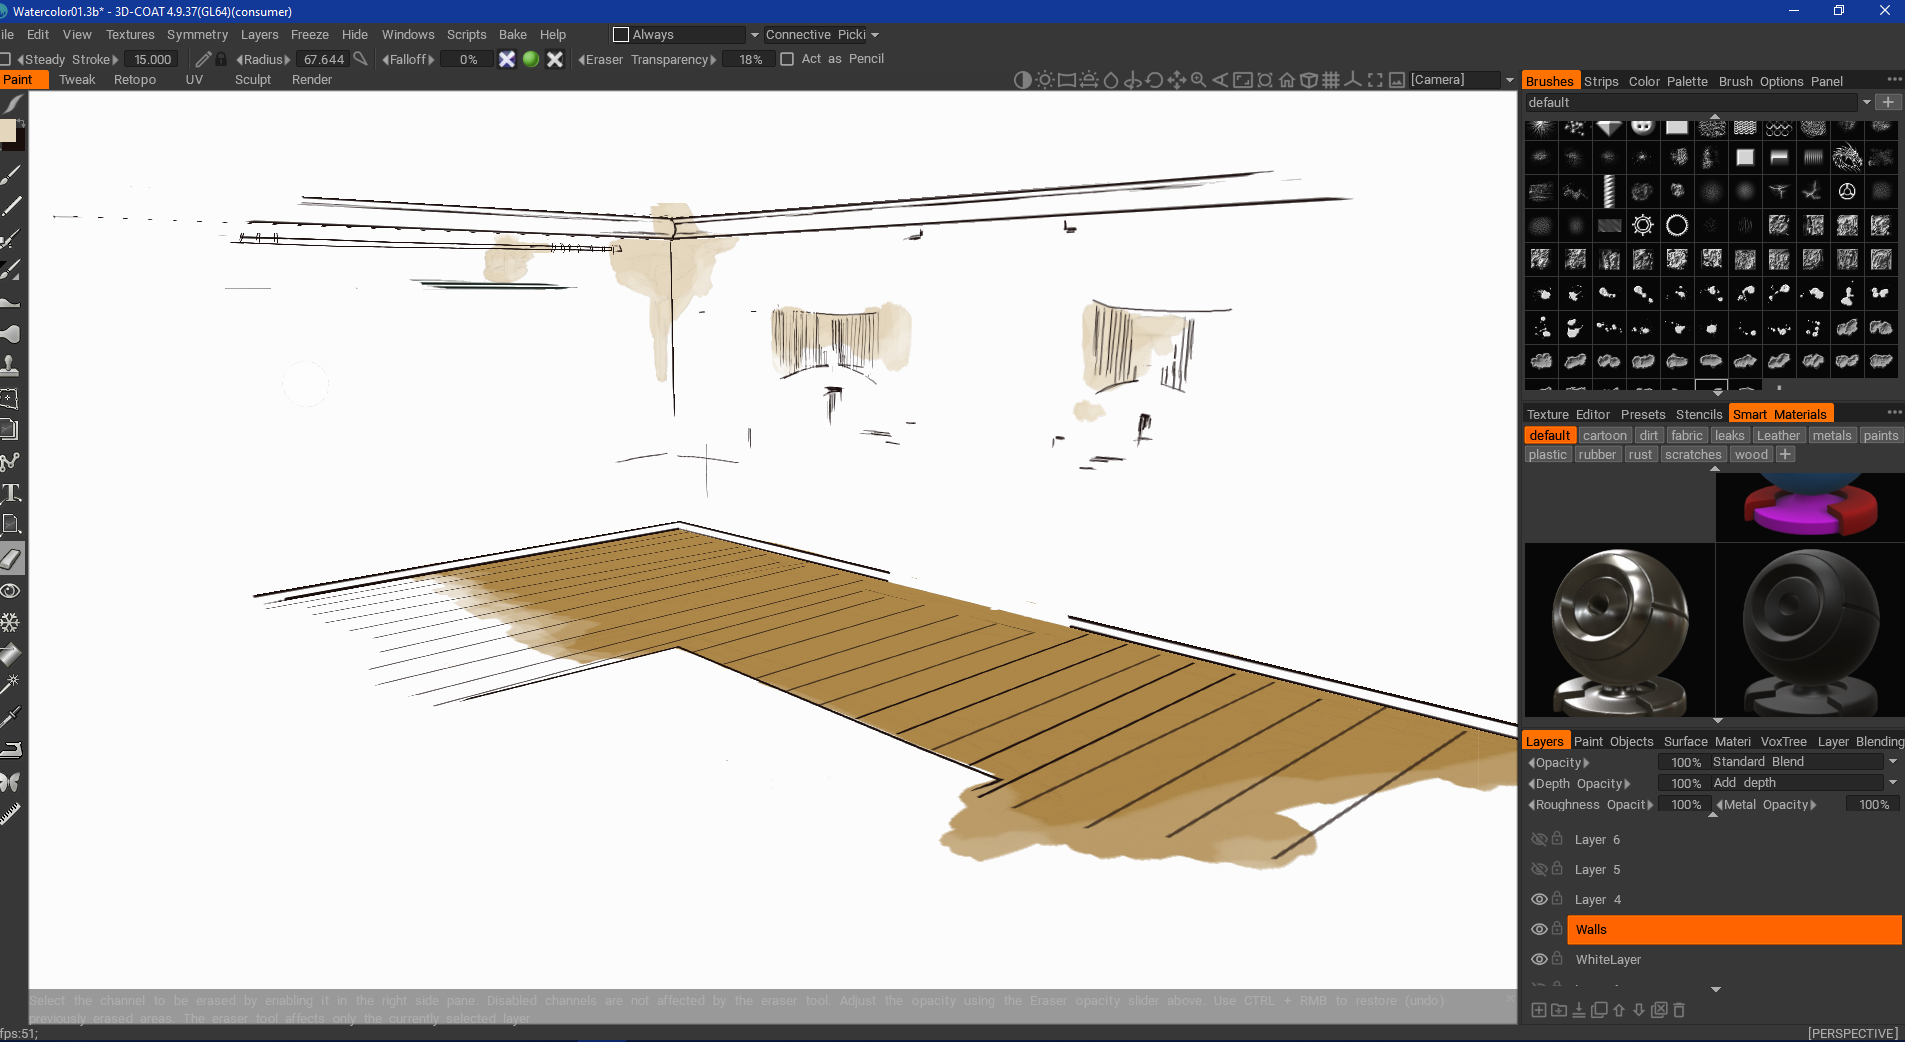
Start painting, and try to recreate the watercolor style as
much as possible. Because everything is invisible, you can see behind objects, making
it feel like the artist didn’t quite paint two the lines creating a loser style.
You can also adjust opacity of your brush to make it feel like two objects are
bleeding into each other. A good idea is to put flat shading on, especially
since for this project we are only concerned with colors.

While painting be sure to periodically zoom out to see the
whole scene, and keep your reference of your original image close at hand in
another tab or on screen. Always check. You want to have the whole scene feel
like a cohesive piece.


While painting in 3DCoat, because of the loose style, you’ll
find that you’ll often paint things you don’t want to paint. That’s okay! When
you finish an object, hide the mesh, and erase everything else to clean up your
scene! Be sure to use a new layer for each object, and you’ll never have to
worry about clean up. When you’re done, then you can come back in and add shadows,
highlights, and intentional bleed over the lines.


It’s done! You can export this model, and it will work in any program that allows transparencies in your textures! Make sure to put your diffuse as an emissive and color layers for extra pop, and to flatten the scene somewhat! The possibilities and styles are endless. So, go paint in 3D! (And never discount 3DCoat!)
The End.


I enjoy how well written your commentary is. You thoroughly explain the process and your work is excellent
ReplyDelete